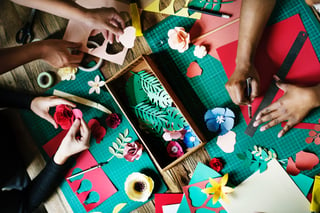
We get it: keeping your kids entertained over the holidays can be a nightmare! That’s why we’ve put together a list of fun activities that will keep little hands occupied during the Easter break!
- Glow in the dark slime
We know the drill: your child has invited a friend over for a sleepover… but, together, they have played every board game under the sun, watched all the latest movies a thousand times and are not interested in colouring in anymore. Instead, let them get involved with a little DIY “scientific” project that turns glue into a slimy concoction that will leave them entertained for hours.
What you’ll need:
- White all-purpose glue
- Food colouring in your child’s favourite colour
- Borax
- Half a cup of warm water
- Glow in the dark paint
How to make it:
- Pour your glue into an old bowl or old ice cream container
- Add a drop of food colouring and a big drop of the glow in the dark paint into the glue mixture, and mix.
- In a separate bowl, mix a teaspoon of borax with the warm water. Mix it really well.
- Slowly mix your borax and warm water mixture with the glue mixture – you will soon find that the mixture firms up and that you may need to knead the mixture.
And that’s it! You can also create a few different coloured slime by using different food colouring.
 2. Jam Jar Aquariums
There’s no denying that most kids love the ocean life but visiting an aquarium isn’t always possible. So, help them create their miniature aquarium – perfect to play with and to keep next to their bed.
What you’ll need
- Recycled jam jars (or Mason Jars)
- Blue food colouring
- Filtered water (simply boil water in your kettle and let it cool)
- Sea life plastic figurines
- Colourful fish tank gravel/rocks
- A plastic ocean plant (one that’s fit for a fish tank); make sure it’s small or big enough to fit into your jar
- Blue and white glitter
- Glycerine
How to make it:
- Start with adding a central plastic plant to your jar.
- Next, add the gravel to the jar – ensure you anchor your plant’s base with the stones.
- Add a sea life plastic figurine.
- Now add half a teaspoon of glitter to the jar.
- In a separate glass, fill it with water and add one drop of the blue food colouring. Keep in mind, that you don’t want your water too murky or blue (aim for see-through colouring).
- Once you have the mixture of the water right, add it to your jar. It’s important to use filtered water as this will prevent algae from growing.
- Screw on your lid tightly.
- Voila! Watch the rocks, glitter and figurines come to life.
Feel free to opt for a bigger jar (like a beetroot or gherkin’s jar) for a bigger impact. The bonus? It never needs cleaning!
- Chirpy treats
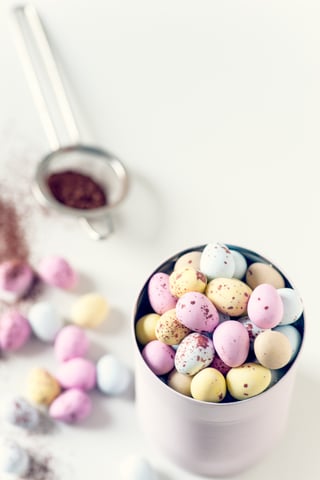
Whether you celebrate Easter or not, kids of all ages love a treat during the Easter holidays. So, help them create a little treasure trove – aptly, in the shape of a chick – to store their sweets.
What you’ll need:
- Egg Carton
- Yellow Paint
- Black marker
- Orange cardboard paper
How to make it
- Cut out two egg cups from your egg carton
- Cut out a piece of cardboard paper that’s one centimetre wide by two centimetres long
- Glue this at the back of each half of the cup – this will create a hinge that holds the cups together.
- Paint your two joined parts in yellow and allow to dry (this may require two coats, depending on the paint you use)
- Next, choose a cup that will serve as your head (the other one will, of course, be the bottom).
- Cut out two triangles from the orange cardboard paper. Glue the one triangle to the top egg cup on the opening side (i.e. on the opposite side to the hinge) – allow the pointy side of the triangle to face outwards of the cup. Do the same to the bottom half. You’ll now see that you’ve created a little beak for your chick.
- Next, cut out feet for you chick using the orange cardboard paper – it can be rectangular, round or in the shape of little chicken’s feet; it’s all about how creative you want to be.
- Stick the feet to the bottom of the chick.
- Using the black marker, draw on small eyes on the top carton.
- Fill with some sweet treats (we prefer speckled eggs, jelly tots, Smarties and Astros!).
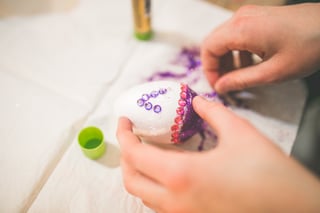
- Bunny Mask
Take storytelling to a whole new level of make belief by creating a homemade, handmade mask. And as it’s Easter, we think a bunny mask seems fitting…
What you’ll need:
- White paper plates
- At least two sheets of A4 cardboard paper in white (the same colour as the paper plates)
- Pink craft paper
- Cotton balls
- Pink pipe cleaners
- Glue or a stapler
- Scissor
- Ice cream stick or a stick to hold your mask
 How to make it:
- Start by cutting out the inner circle of the paper plate – ensuring you keep the outer circle intact (you may have to pierce a hole in the middle of the paper plate with your scissors so that you can cut the middle section out… mom or dad’s help may be needed here).
- Next, using your sheets of cardboard paper, draw the shape of bunny ears – there are no rules here; any interpretation will work!
- Next, trace a smaller shape of your bunny ears on the pink craft paper – this will be the inner part of your bunny ears.
- Glue your pink “inner ears” to your big bunny ears.
- Then, glue or staple the ears to your paper plate.
- On either side of the bunny’s face, glue or staple three pink pipe cleaners. (If you can’t find any pink ones, simply let your white ones lie a mixture of water and red food colouring; allow to dry before using them.)
- Then, glue cotton balls all around your paper plate face and around the ears (note: keep the pink inner ears visible).
- Once this is dry, glue an ice cream stick to the bottom back of your mask.
- Now, story time can really start!
You can also make a Lion Mask using these instructions; simply use yellow wool where you would use cotton wool; yellow pipe cleaners and make ears that fit a lion. Or a sheep, piggy, giraffe, dog and cat – let the imagination run wild!
- Water Bottle Piggy Bank
We believe that the earlier you teach your child to save money, the more likely they are to do so when they get older. Here’s a fun, creative project that will get them really excited about saving those R1, R2 and R5 coins…
What you’ll need:
- Empty 1 litre plastic bottle
- Craft knife (or NT cutters)
- Scissors
- 1 sheet of craft paper in your child’s favourite colour
- 1 sheet of craft paper in your child’s other favourite colour
- Pencil
- Glue
- Sellotape
- Black marker
- 4 wood beads
- Paint (optional)
How to make it
- Soak your bottle in warm water so that the label will easily peel off – don’t make the water to warm as we don’t want your bottle to melt!
- Using your craft knife, cut a small slit down the middle of your bottle, where you would feed your coins. The slot ideally should be 2cm long by 3mm wide.
- Next, cut a strip from one of the sheets, long enough to wrap around the bottle – much like the label of the bottle.
- Once you have your cut strip of paper, wrap it around your bottle again and mark with your pencil where the slot will be. Use your craft knife to remove this strip from the sheet.
- Using your other colour piece of paper, cut out the shape of two ears. Again, be as creative as you want to be here!
- Position your ears along the edge of your paper band, on the side that you’ve removed the money slot (i.e. the top part of the band). Tape the edge of the ears to it.
- Next, tape the band (with the ears) around your bottle. Make sure that the slit in the paper aligns with the slit in your bottle, and that your ears are facing the front of the bottle.
- Now, trace the bottle cap on the same colour paper that you used for your piggy’s band. Cut it out and glue this to the outside of your bottle cap. You can draw two small dots in the centre as the nostrils.
- Using the same colour paper you used for your piggy’s ears, cut out two small circles for eyes. And glue these then to the piggy for eyes.
- Lastly, use glue wooden beads to the bottom of your piggy for legs. You can even paint them for added effect.
Happy saving!